
Our Latest Articles
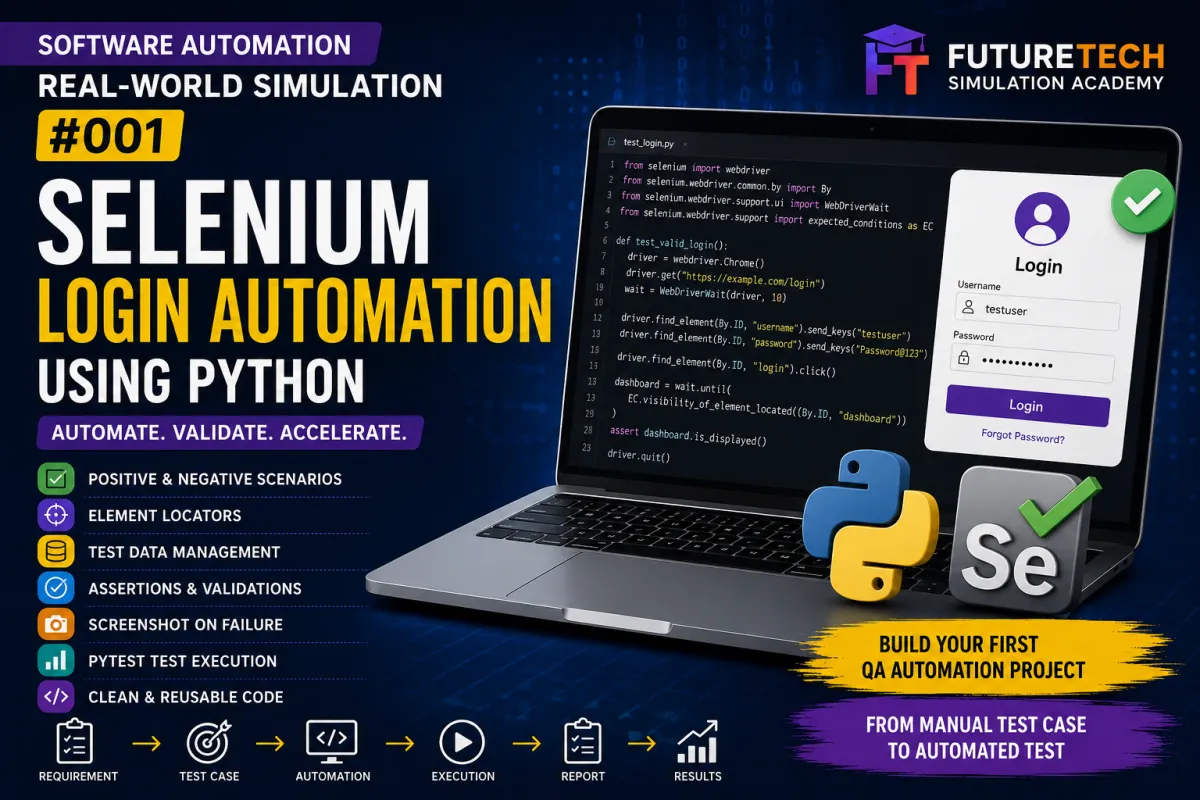
Selenium Login Automation Using Python — Real-World Automation Simulation #001
Don’t Just Learn Automation. Simulate the Job.
Welcome to Day 1 of the FutureTech Real-World Software Automation Simulation Series.
In the previous Software Testing Simulation, we manually analyzed a Login application and created test scenarios and test cases.
Now we are taking the next step.
We are going to automate selected Login test cases using:
Selenium WebDriver
Python
pytest
This project is designed to simulate the work of a Junior QA Automation Engineer.
Instead of learning Selenium commands individually, we will start with a real testing requirement and convert a manual test into an automated test.
Project Overview
Imagine that you are working as a QA Automation Engineer in a software company.
The development team has completed a Login feature.
The manual QA team has already created test cases.
Your responsibility is to automate the repetitive Login scenarios so they can be executed quickly during regression testing.
The Login page contains:
Username field
Password field
Login button
Forgot Password link
The objective is to automate the important Login scenarios and verify that the application behaves as expected.
What We Will Build
By the end of this project, we will have an automated Login testing project that can:
Open a browser
Navigate to the Login page
Locate web elements
Enter username
Enter password
Click Login
Verify successful login
Verify invalid login
Verify validation messages
Execute multiple test cases
Generate test results
The project will also prepare us for the next stage:
Page Object Model.
Manual Testing to Automation
In the previous project, we created a manual test case.
Example:
Test Case ID: TC_LOGIN_001
Scenario:
Verify successful login with valid credentials.
Steps:
Open Login page.
Enter username.
Enter password.
Click Login.
Verify successful login.
Now our job is to automate these same steps.
Why Automate This Test?
Imagine executing the Login test manually every time a new application version is released.
You might need to repeat the same steps:
Open browser
Open application
Enter username
Enter password
Click Login
Verify result
Repeat the process for multiple test cases.
If the same test needs to be executed hundreds of times, manual execution becomes time-consuming.
Automation allows us to execute repetitive tests quickly and consistently.
However, automation is not simply about saving time.
A good automation test should also be:
Reliable
Repeatable
Maintainable
Readable
Reusable
Easy to execute
Technologies Used
This project uses:
Python
Selenium WebDriver
pytest
Web Browser
GitHub
Python will be used as our programming language.
Selenium will interact with the browser.
pytest will organize and execute our tests.
GitHub will store the automation project.
What Is Selenium?
Selenium is a widely used open-source framework for automating web browsers.
It allows an automation script to perform actions similar to a real user.
For example:
Open a website
Click a button
Enter text
Select an option
Read text
Verify an element
Navigate between pages
Selenium supports multiple browsers and programming languages.
What Is WebDriver?
Selenium WebDriver provides the mechanism for controlling a web browser.
Our Python automation script communicates with Selenium.
Selenium communicates with the browser.
The browser performs the requested action.
The basic flow is:
Python
↓
Selenium WebDriver
↓
Browser
↓
Web Application
Step 1 — Install Python
First, verify that Python is installed.
Open Command Prompt or Terminal and run:
python --version
You should see a Python version.
For example:
Python 3.x.x
If Python is not installed, install a current supported Python version before continuing.
Step 2 — Create the Project Folder
Create a folder:
futuretech-selenium-login-automation
Open this folder in Visual Studio Code.
Your initial project can look like:
futuretech-selenium-login-automation
Inside the project we will create:
tests
pages
test_data
screenshots
reports
Step 3 — Create a Virtual Environment
Using a virtual environment is recommended for Python automation projects.
Run:
python -m venv venv
Activate the environment.
On Windows:
venv\Scripts\activate
After activation, you should see the virtual environment name in your terminal.
Step 4 — Install Selenium
Install Selenium using:
pip install selenium
Verify the installation:
pip show selenium
Step 5 — Install pytest
Install pytest:
pip install pytest
Verify:
pytest --version
Step 6 — Create requirements.txt
Create a file called:
requirements.txt
Add:
selenium
pytest
This makes it easier for another developer or tester to install the project dependencies.
They can run:
pip install -r requirements.txt
Step 7 — First Selenium Program
Before creating the complete framework, let's understand the basic Selenium workflow.
The automation flow is:
Create WebDriver
↓
Open browser
↓
Navigate to URL
↓
Find element
↓
Perform action
↓
Verify result
↓
Close browser
Step 8 — Open the Browser
A basic Selenium script starts by creating a WebDriver.
Example:
from selenium import webdriver
driver = webdriver.Chrome()
driver.get("YOUR_TEST_APPLICATION_URL")
driver.quit()
This launches Chrome, opens the application, and closes the browser.
Step 9 — Locating Web Elements
Automation needs to identify elements on a webpage.
Common Selenium locators include:
ID
Name
Class Name
Tag Name
Link Text
Partial Link Text
CSS Selector
XPath
For example, if the HTML contains:
<input id="username">
We can locate it using:
driver.find_element(By.ID, "username")
Step 10 — Import By
To use Selenium locators:
from selenium.webdriver.common.by import By
Then:
username = driver.find_element(By.ID, "username")
Step 11 — Enter Username
Use the send_keys() method.
Example:
username.send_keys("testuser")
This simulates typing into the Username field.
Step 12 — Enter Password
Locate the Password field.
Example:
password = driver.find_element(By.ID, "password")
Then:
password.send_keys("Password@123")
Step 13 — Click Login
Locate the Login button.
Example:
login_button = driver.find_element(By.ID, "login")
Then:
login_button.click()
Step 14 — Add an Assertion
Automation should not simply perform actions.
It must verify the result.
This is where assertions are important.
For example:
assert "Dashboard" in driver.title
The assertion checks whether the expected result occurred.
If the assertion passes:
The test passes.
If the assertion fails:
The test fails.
Complete Basic Login Flow
The conceptual automation is:
Open browser
↓
Open Login page
↓
Find Username
↓
Enter username
↓
Find Password
↓
Enter password
↓
Find Login button
↓
Click Login
↓
Verify result
↓
Close browser
Step 15 — First pytest Test
Instead of creating only a standalone Selenium script, we can use pytest.
Example structure:
tests
test_login.py
The test can contain:
def test_valid_login():
Open Login pageEnter username
Enter password
Click Login
Verify successful login
pytest gives us a standard way to discover and execute automated tests.
Step 16 — Positive Login Test
Our first automated test is:
Test Case:
TC_LOGIN_001
Scenario:
Valid username + valid password.
Expected:
User successfully logs in.
Automation flow:
Open Login page.
Locate Username.
Enter valid username.
Locate Password.
Enter valid password.
Click Login.
Verify successful login.
Step 17 — Negative Login Test
Now automate:
TC_LOGIN_002
Scenario:
Invalid username + valid password.
Test Data:
Username: invaliduser
Password: Password@123
Expected:
Login should fail.
The automation should verify that the expected error message is displayed or that the user remains on the Login page, according to the application's requirement.
Step 18 — Invalid Password Test
Next:
TC_LOGIN_003
Scenario:
Valid username + invalid password.
Test Data:
Username: testuser
Password: WrongPassword
Expected:
Login should fail.
Step 19 — Empty Username Test
Next:
TC_LOGIN_005
Scenario:
Username is empty.
Password:
Password@123
Expected:
Username validation message should be displayed.
This demonstrates that automation is not only about successful workflows.
We also automate negative and validation scenarios.
Step 20 — Empty Password Test
TC_LOGIN_006
Scenario:
Username:
testuser
Password:
Empty
Expected:
Password validation message should be displayed.
Step 21 — Both Fields Empty
TC_LOGIN_007
Scenario:
Username:
Empty
Password:
Empty
Expected:
Appropriate validation messages should be displayed.
Login should not be successful.
Step 22 — Assertions
Assertions are one of the most important concepts in automation testing.
Without assertions, an automation script may simply perform actions without determining whether the application behaved correctly.
For example:
Click Login
is an action.
Verify Dashboard is displayed
is a validation.
Automation needs both.
Action:
driver.find_element(...).click()
Assertion:
assert dashboard.is_displayed()
Step 23 — Why Assertions Matter
Imagine your script performs:
Open browser
Enter username
Enter password
Click Login
Then the script finishes.
How do you know whether Login worked?
You don't.
That's why automation requires verification.
The basic rule is:
Action + Assertion = Meaningful Automation Test
Step 24 — Test Execution
Run the tests using:
pytest
Or:
pytest -v
The -v option provides more detailed test information.
Example result:
test_login.py::test_valid_login PASSED
test_login.py::test_invalid_username PASSED
test_login.py::test_invalid_password PASSED
The actual result will depend on the test application and your implementation.
Step 25 — Understanding PASS and FAIL
PASS means:
The actual behavior matched the expected behavior.
FAIL means:
The actual behavior did not match the expected behavior.
A failed automation test does not automatically mean the application has a defect.
The failure could also be caused by:
Incorrect locator
Timing issue
Test data problem
Environment problem
Application problem
Incorrect assertion
This is an important concept for QA Automation Engineers.
Step 26 — Common Selenium Problems
Beginners commonly encounter errors such as:
NoSuchElementException
TimeoutException
ElementNotInteractableException
StaleElementReferenceException
WebDriverException
These errors should be analyzed rather than simply increasing the timeout.
A good automation engineer investigates the root cause.
Step 27 — Locator Strategy
Locator quality has a major impact on automation stability.
Prefer stable attributes such as:
ID
Name
data-testid
Stable CSS selectors
Avoid unnecessarily complex XPath expressions when a stable ID or CSS selector is available.
For example:
Good:
By.ID, "username"
Potentially fragile:
A long XPath based on multiple nested elements.
Step 28 — Waits
Web applications are dynamic.
Sometimes an element exists in the DOM but is not immediately ready for interaction.
This is why synchronization is important.
Selenium provides explicit waits through WebDriverWait.
Conceptually:
Wait
↓
Element becomes available
↓
Perform action
Avoid blindly adding:
time.sleep()
throughout your framework.
Explicit waits are generally more maintainable because they wait for a specific condition.
Step 29 — Screenshots on Failure
A useful automation framework should provide evidence when a test fails.
For example:
Test fails
↓
Capture screenshot
↓
Save screenshot
↓
Review failure
This makes debugging easier.
Later in the series, we can integrate automatic screenshot capture into the framework.
Step 30 — Project Structure
Our initial project can use:
futuretech-selenium-login-automation
tests
test_login.py
pages
login_page.py
test_data
login_data.py
screenshots
reports
requirements.txt
.gitignore
Step 31 — Why We Need Page Objects
At this point, you may notice something.
Suppose we have 20 tests.
Every test contains:
Find username
Find password
Click Login
Now imagine the Username locator changes.
We might have to modify many test files.
This is difficult to maintain.
This leads us to the next concept:
Page Object Model.
Step 32 — Page Object Model
Page Object Model, commonly called POM, separates:
Page locators and actions
from
Test scenarios.
Instead of putting every locator directly into the test, we create a LoginPage class.
Conceptually:
LoginPage
↓
Username locator
Password locator
Login button locator
Enter username()
Enter password()
Click login()
Then our test becomes much cleaner.
Step 33 — Automation Framework Evolution
Our learning journey is:
Stage 1
Basic Selenium Script
↓
Stage 2
pytest
↓
Stage 3
Reusable Functions
↓
Stage 4
Page Object Model
↓
Stage 5
Data-Driven Testing
↓
Stage 6
Reporting
↓
Stage 7
Screenshots
↓
Stage 8
CI/CD
Step 34 — What Should Be Automated?
Not every test case should automatically be converted into an automation script.
Good candidates usually include tests that are:
Repetitive
Stable
Frequently executed
Time-consuming manually
Important for regression
Data-driven
High-volume
For example:
Login regression tests are usually excellent automation candidates.
Step 35 — Manual Test vs Automation Test
Manual:
Tester opens browser.
Tester enters username.
Tester enters password.
Tester clicks Login.
Tester checks result.
Automation:
Selenium opens browser.
Selenium enters username.
Selenium enters password.
Selenium clicks Login.
pytest verifies result.
Step 36 — Real-World QA Workflow
A professional QA Automation workflow can look like:
Requirement
↓
Risk Analysis
↓
Test Scenarios
↓
Test Cases
↓
Manual Validation
↓
Identify Automation Candidates
↓
Develop Automation
↓
Execute Tests
↓
Analyze Failures
↓
Report Defects
↓
Regression Testing
↓
CI/CD
Step 37 — Practical Assignment
Create automation tests for the following:
Valid Login
Invalid Username
Invalid Password
Empty Username
Empty Password
Both Fields Empty
Password Masking
Forgot Password Navigation
For every automated test, identify:
Test Case ID
Test Data
Locator Strategy
Action
Expected Result
Assertion
Step 38 — Beginner Exercise
Start with one test.
Automate:
Valid Login.
Do not worry about building a large framework immediately.
Focus on understanding:
How Selenium opens the browser.
How Selenium finds elements.
How Selenium enters data.
How Selenium clicks elements.
How pytest executes a test.
How assertions determine pass/fail.
Step 39 — Intermediate Exercise
After the basic test works, automate:
Invalid username
Invalid password
Empty username
Empty password
Both fields empty
Then execute all tests together.
This introduces the concept of an automation test suite.
Step 40 — Advanced Exercise
Improve the project by adding:
Explicit waits
Reusable functions
Screenshot on failure
Test data separation
Page Object Model
HTML reporting
Multiple browsers
This will prepare you for the next projects in the series.
Portfolio Project Description
You can describe this project on your resume or GitHub portfolio as:
“Developed a Selenium WebDriver automation project using Python and pytest to automate Login functionality, including positive, negative, and validation scenarios. Implemented browser interaction, element locators, test assertions, reusable automation practices, and structured test execution.”
What You Learned
By completing this project, you should understand:
What Selenium is
What WebDriver does
How to open a browser
How to navigate to a webpage
How to locate elements
How to enter text
How to click elements
How to use assertions
How to create pytest tests
How to execute automation tests
How to analyze test failures
Why stable locators matter
Why synchronization matters
Which tests are good automation candidates
What Comes Next?
We have created a basic Selenium Login automation project.
But there is a problem.
As the number of tests increases, the code can become difficult to maintain.
This is why our next simulation focuses on:
Page Object Model.
Automation Simulation Roadmap
Day 1
Selenium Login Automation
Day 2
Page Object Model Framework
Day 3
Data-Driven Testing
Day 4
Explicit Waits and Dynamic Elements
Day 5
BDD Automation with Cucumber
Day 6
Playwright Automation
Day 7
API Automation
Future
CI/CD Test Automation
Final Takeaway
Learning Selenium is not about memorizing:
find_element()
click()
send_keys()
The real skill is understanding how to convert a manual test scenario into a reliable, maintainable automated test.
The progression is:
Think Like a Tester
↓
Design the Test
↓
Automate the Test
↓
Verify the Result
↓
Analyze Failures
↓
Improve the Framework
Don't just learn Selenium.
Build something with Selenium.
Don't just write automation scripts.
Learn how professional automation frameworks are designed.
Learn → Simulate → Automate → Test → Improve → Share
FutureTech Simulation Academy
Don't Just Learn Technology. Simulate the Job.


Facebook
Instagram
X
LinkedIn
Youtube
WhatsApp